Chapter 2: Startup, Updates, and User Settings
This chapter covers the application startup process, automatic updates, user settings management, and data storage. Understanding these elements ensures smooth operation and proper configuration maintenance.
For initial installation and license activation, see Chapter 1: Installation and Licensing. For details about the main application interface, proceed to Chapter 4: Main User Interface.
Startup and Updates
Change Log
When you launch SleepCoder, the application automatically checks for updates. If a new version is available or has recently been installed, the Change Log dialog will appear, showing you what's new in the latest release.
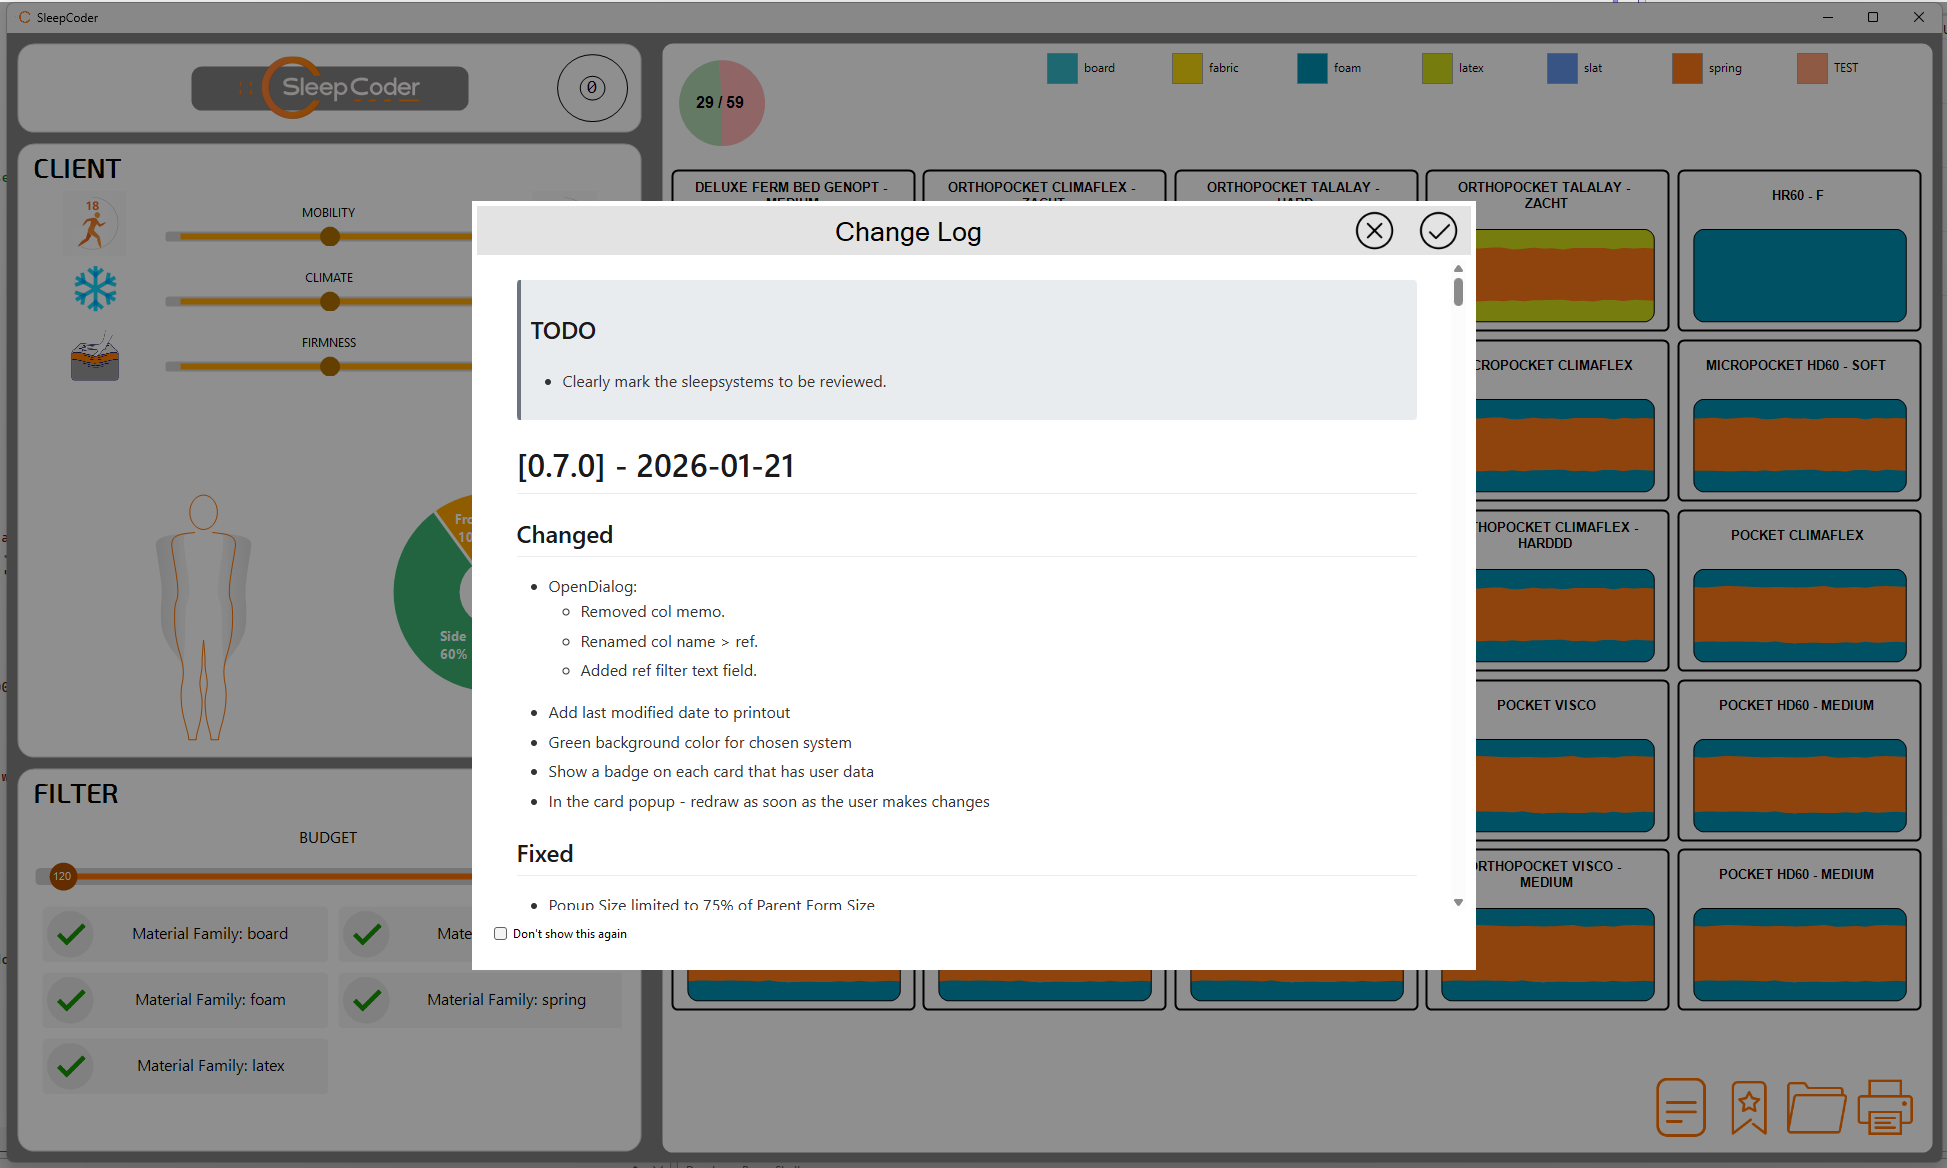
The Change Log provides:
- Version Information: The current version number and release date
- New Features: Recently added functionality and improvements
- Bug Fixes: Issues that have been resolved
- Important Notes: Any critical information you should be aware of
You can review this information and click "OK" to continue. You can always access the full Change Log later in the About tab on the User Settings.
Accessing User Settings
At first startup, the User Settings form will automatically appear to configure the User License and API credentials (see Chapter 1: Installation and Licensing for initial setup details).
At any other time, you can access the User Settings by:
- Right-clicking on the SleepCoder Logo
- Selecting "Settings" from the menu
- Using the keyboard shortcut (if configured)
User License Management
The User License tab shows your current license information and activation status. You can access this from the Help menu or during initial setup.
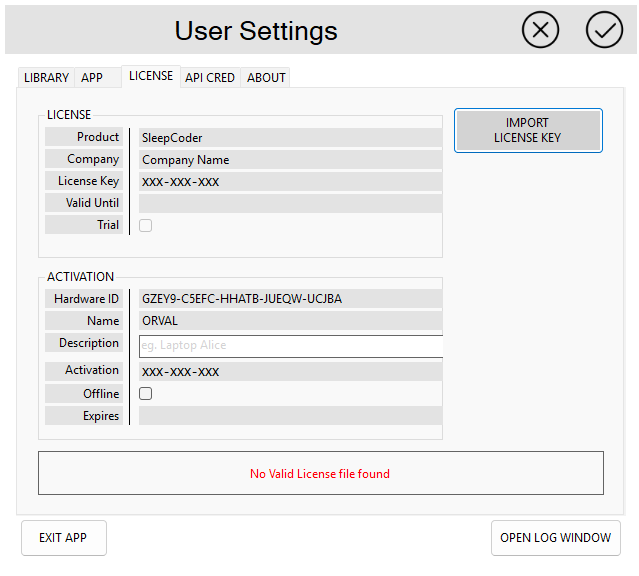
License Information Display
The license screen displays comprehensive information about your installation:
- Licensee Name: The name of the person or organization to whom the license is registered
- Company: The company name associated with the license
- Computer Description: A mandatory field to identify this specific installation (e.g., "Showroom PC 1")
- License Status: Indicates whether the license is activated and currently valid
- Expiration Date: For trial licenses, displays when the license expires and renewal is required
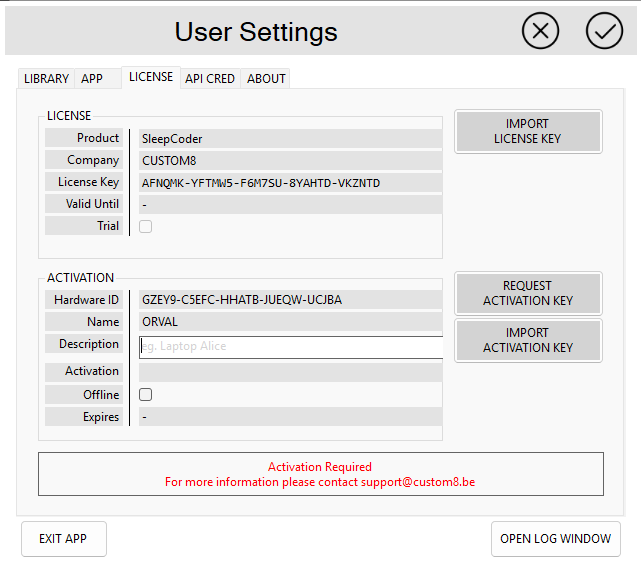
Managing Your License
Importing a New License
If you need to update or replace your license file (for example, when upgrading from a trial to a full license), click the "Import License" button. Navigate to your new license file (typically .xml or .json format) and select it. The system will validate and import the new license information automatically.
Activating a License
Follow the activation steps described in Chapter 1: Installation and Licensing to complete the license activation process.
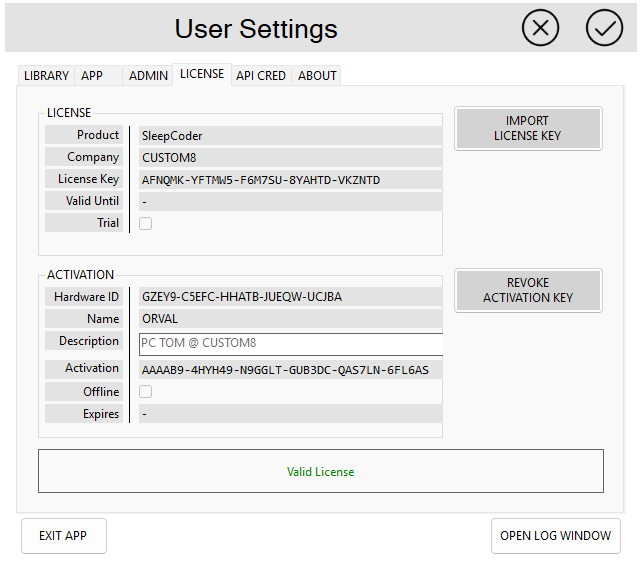
Revoking a License
If you need to transfer your license to a different computer, you may need to revoke the current activation first. Contact your SleepCoder vendor for assistance with license transfers.
💡 Important Notes:
- Keep your license file in a safe location - you may need it if you reinstall the application
- Trial licenses have expiration dates; contact your vendor for license renewal before expiration
- Each license may be restricted to a specific number of installations
- Backing up your license file is recommended for disaster recovery
API Credentials Configuration
SleepCoder connects to cloud-based recommendation services that require API credentials. These credentials authenticate your installation and enable access to your component library and recommendation engine.
For initial API setup during installation, see Chapter 1: Installation and Licensing.
Accessing API Settings
Navigate to the API Credentials tab in the User Settings dialog.
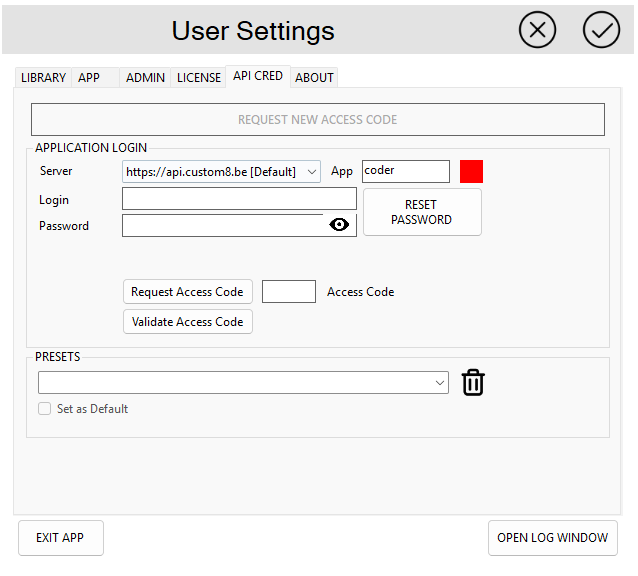
Configuring Your Credentials
Step 1: Enter API Information
You'll need to enter the following information (provided by your SleepCoder administrator or vendor):
- API URL: The endpoint address for the API service
- Login: Your unique authentication username
- Password: Your personal password associated with your account
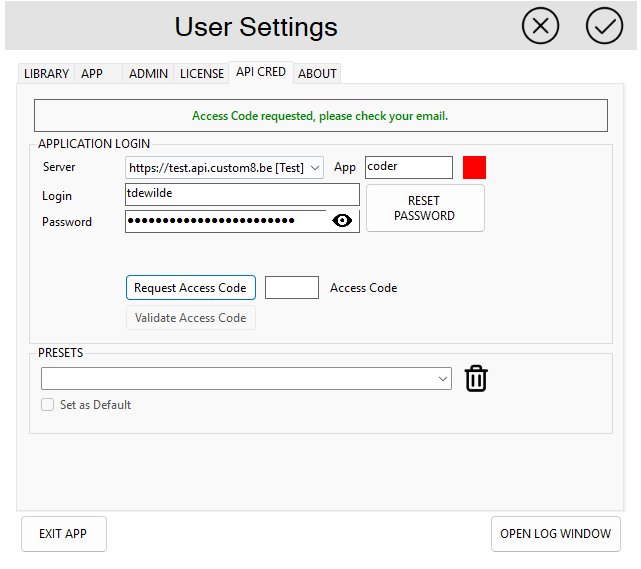
Step 2: Request an Access Token
After entering your credentials, click the "Request Access Token" button:
- The API server will verify your credentials
- If valid, a one-time access token will be sent to the email address linked to your account
- Check your email and copy the access token
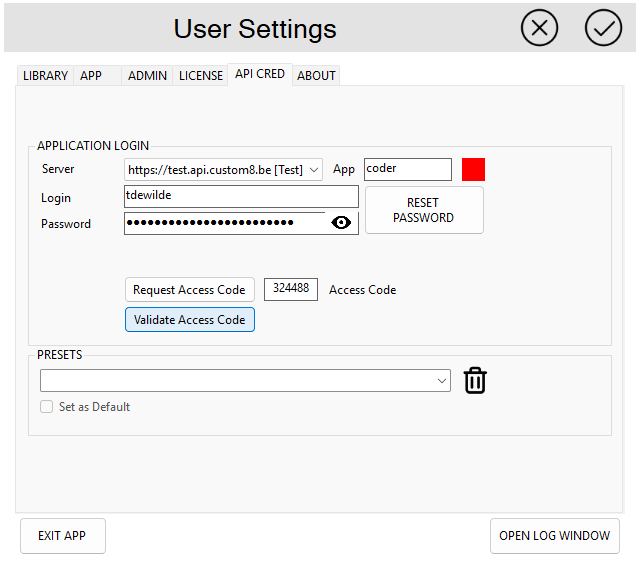
- Enter the access token in the textbox
- Click "Validate Token" to confirm
⚠️ Note: The access token expires after 1 hour for security purposes. If it expires, simply request a new token.
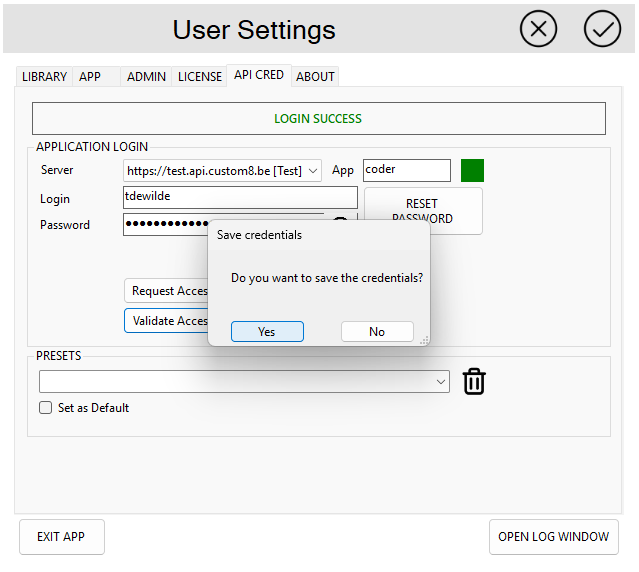
Step 3: Save and Activate
Once validation is successful, click "Save" to store your credentials. The application will now be able to communicate with the API server to access the component library and recommendation engine.
Troubleshooting API Connections:
- Verify your internet connection is active and stable
- Ensure firewall settings allow the application to access the API URL
- Confirm your credentials haven't expired - contact your vendor if needed
- Check that the API URL is entered correctly without extra spaces or typos
- Verify the access token was copied completely without additional characters
- Ensure the access token hasn't expired (valid for 1 hour only)
About SleepCoder
The About dialog provides detailed information about your SleepCoder installation. Access it from the Help menu.
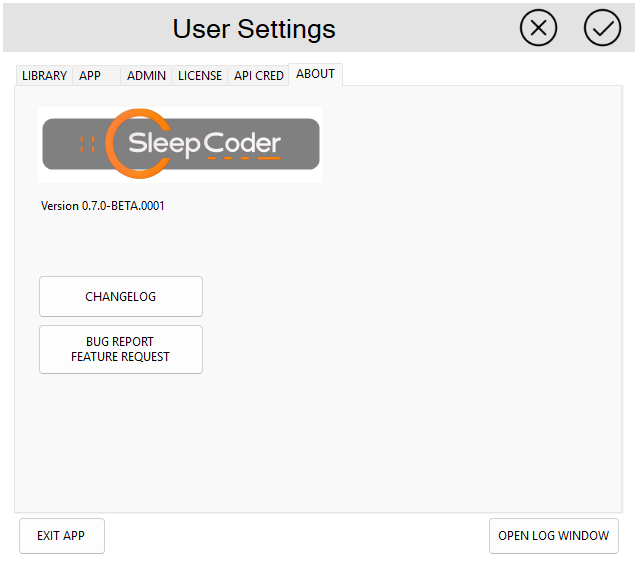
The About screen displays:
- Application Version: The current version number of SleepCoder
- Build Information: Technical build details for support purposes
- Copyright Information: Legal and licensing information
- System Information: Details about your installation environment
- Third-Party Libraries: Acknowledgments for open-source components used
This information is helpful when:
- Contacting technical support
- Reporting bugs or issues
- Verifying you have the latest version
- Checking system compatibility
Application Data Folder
SleepCoder stores important data in a specific application folder on your computer. Understanding this folder structure is helpful for backup, troubleshooting, and data management.
Folder Location
The application data folder is typically located at:
%MyDocuments%\custom8\SleepCoder\
Or the full path:
C:\Users\[YourUsername]\Documents\custom8\SleepCoder\
Folder Contents
The SleepCoder data folder contains several important subfolders:
logssubfolder: Contains diagnostic and activity logs for troubleshooting- Application error logs
- API communication logs
- User activity tracking
settingssubfolder: Stores your user preferences and configuration- User interface preferences
- Filter presets
- Display settings
💡 Important Notes:
- These files are automatically managed by the application
- Do not manually edit configuration files unless directed by technical support
- Consider backing up this folder before major updates or reinstallations
- Deleting this folder will reset all user preferences to defaults
- The folder may also contain cached component library data for offline access
Backup Recommendations
For data safety, consider:
- Regular backups of the entire SleepCoder folder
- Before major updates, copy the folder to a safe location
- Cloud backup services can automatically protect this folder
- Keep license files separate from the application data folder
Summary
The startup dialogs and settings pages help you:
- Stay Updated: Review change logs to understand new features and improvements
- Manage Licensing: Activate, maintain, and renew your user license
- Configure Connectivity: Set up and maintain API credentials for cloud services
- Access Information: View application details, version information, and system compatibility
- Understand Data Storage: Know where your settings and logs are stored for backup and troubleshooting
For additional help or support, contact your SleepCoder vendor or refer to the online documentation.
Next Steps: Continue to Chapter 3: Component Library Management to learn how to manage your sleep system components, or proceed to Chapter 4: Main User Interface to start using the application.