Chapter 1: Installation and Licensing
This chapter guides you through the SleepCoder installation process, user license activation, and API credentials configuration. Proper setup ensures seamless access to the recommendation engine and component library.
For an overview of SleepCoder's capabilities, see Chapter 0: Introduction. After completing installation, proceed to Chapter 2: Startup, Updates, and User Settings for ongoing configuration management.
Installation Process
The SleepCoder installation wizard guides you through the setup process step by step. Follow the instructions below for a successful installation.
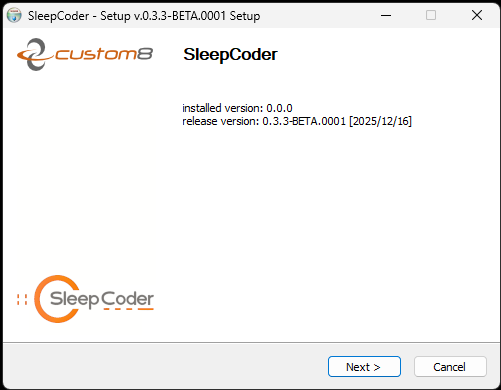
Step 1: Launch the Installation Wizard
When you run the installer, the setup wizard screen will appear, displaying the SleepCoder logo and installation options.
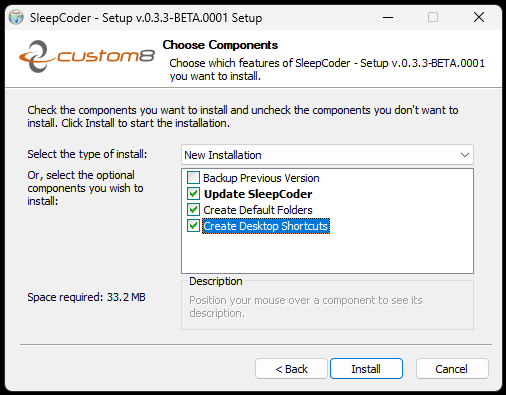
Step 2: Select Installation Components
During installation, you can select which components to install. The default installation includes all necessary components for the application to function properly. You can customize the installation by selecting or deselecting specific components based on your requirements.
Recommended: Use the default selection for a complete installation unless you have specific customization needs.
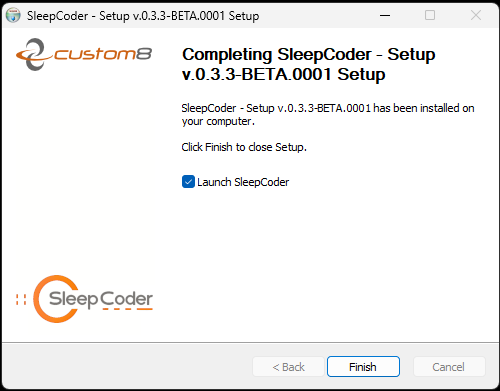
Step 3: Complete Installation
After the installation completes, you have the option to automatically launch the application. Check the "Launch SleepCoder" option if you want to start using the program immediately and proceed directly to license activation.
Desktop Shortcut
Once installation is complete, a desktop shortcut will be created for easy access to the SleepCoder application. Simply double-click the shortcut icon to launch the program.

Automatic Updates
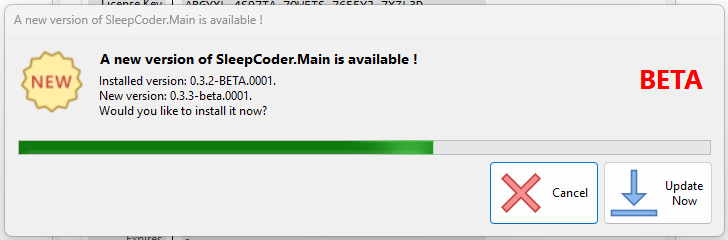
SleepCoder includes an automatic update feature that checks for new versions when the application starts. When an update is available, you'll be notified and can choose to download and install it. This ensures you always have access to the latest features, improvements, and bug fixes.
Update Process:
- Application checks for updates at startup
- Notification appears if a new version is available
- Click "Update Now" to download and install
- Application restarts with the new version
Change Log
You can view the complete list of changes, new features, and bug fixes in each version by accessing the Change Log from the Help menu or by referring to the ChangeLog.md file in the documentation folder. See Chapter 2: Startup, Updates, and User Settings for details on viewing the change log.
User License and API Credentials
Before you can fully use SleepCoder, you must activate your user license and configure your API credentials for accessing the recommendation engine and component library.
User License Activation
The user license activation process involves three steps. This is typically completed during first launch, but can also be accessed later through the User Settings menu (right-click the SleepCoder logo).
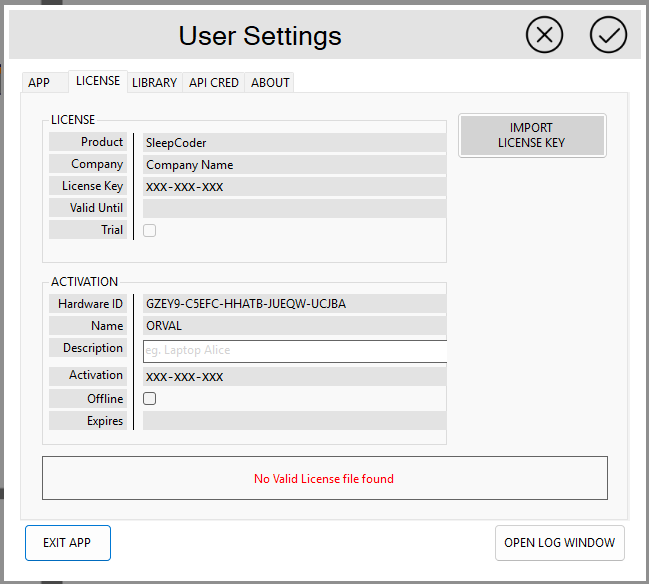
Step 1: Import License File
After launching the application for the first time, you'll be prompted to import your license file. Click the "Import License" button and navigate to the location where you saved your license file (typically with a .xml or .json extension). Select the file to proceed.
⚠️ Important: Keep your license file in a secure location - you may need it if you reinstall the application or transfer to a new computer.
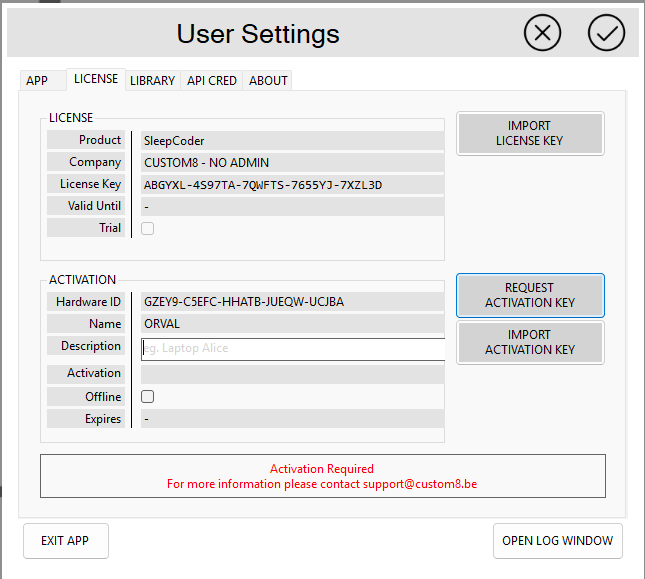
Step 2: License Activation
Once the license file is imported, the system will validate it and display your license information, including:
- Licensee Name: The name of the person or organization
- Company: The company name associated with the license
- Expiration Date: For trial licenses, the date when the license expires
Review this information to ensure it's correct, add a description of the computer where this software is installed (mandatory field), then click "Activate" to complete the activation process.
💡 Tip: Use a descriptive computer name that helps you identify this installation (e.g., "Reception Desk PC" or "Showroom Terminal 1").
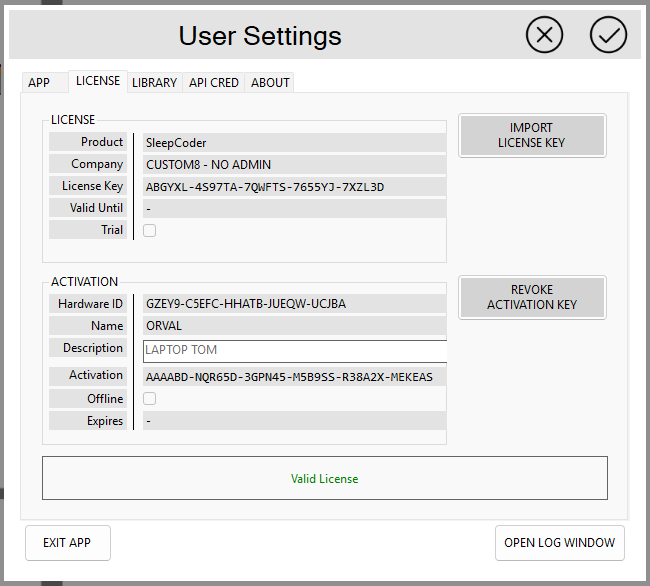
Step 3: Activation Complete
When the activation is successful, you'll see a confirmation message indicating that your license has been activated. You can now proceed to configure your API credentials.
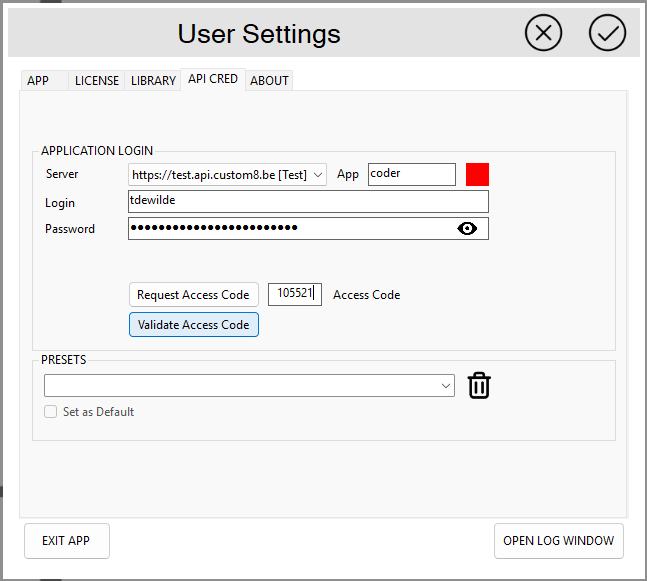
API Credentials Configuration
API credentials are required to access the SleepCoder recommendation engine and component library. These credentials are provided by your system administrator or obtained during your account registration.
Step 1: Request API Access Code
Navigate to the API Credentials configuration tab from the Settings menu. Here you'll need to enter your API credentials, which include:
- API Server: The server URL for the recommendation service (usually pre-configured)
- API Login: Your unique identifier for accessing the API
- API Password: The password associated with your account
Click "Request Activation Code" to request a one-time access code. This access code is sent to the email address linked to the user's login. Open your email program to retrieve the code. The code is valid for 1 hour.
⚠️ Security Note: The one-time code expires after 1 hour for security purposes. If it expires, simply request a new code.
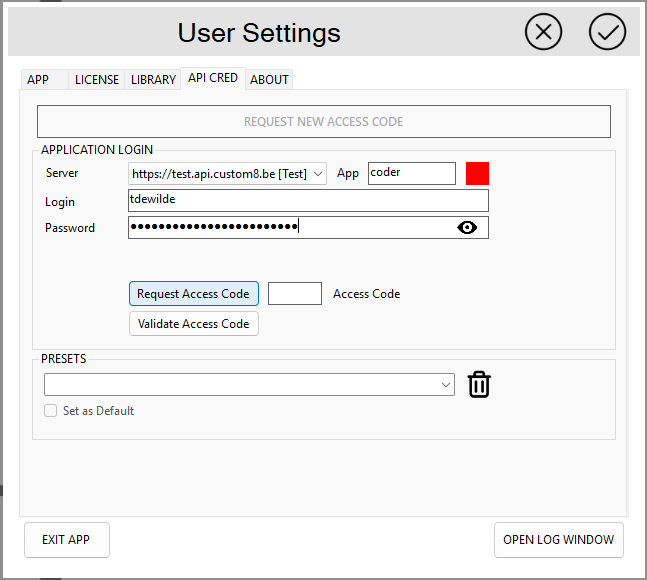
Step 2: Validate Credentials
After entering the one-time access code from your email, click "Validate" to test the connection to the API server. The system will verify that your credentials are correct and that the API service is accessible. A successful validation will be indicated by a green 'SUCCESS' confirmation message.
Troubleshooting Connection Issues:
- Verify your internet connection is active and stable
- Ensure firewall settings allow the application to access the API URL
- Confirm your credentials haven't expired - contact your vendor if needed
- Check that the API URL is entered correctly without extra spaces
- Verify the one-time code hasn't expired (valid for 1 hour only)
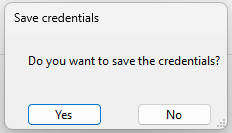
Step 3: Save Configuration
Once your credentials are validated successfully, click "Save" to store the configuration. Your API credentials will be securely encrypted and saved locally on your computer. The application is now fully configured and ready to use.
⚠️ Security Best Practices:
- Keep your User License and API credentials secure and do not share them with unauthorized users
- Do not write down passwords in unsecured locations
- If you suspect your credentials have been compromised, contact your system administrator immediately to request new credentials
- Regularly update your password according to your organization's security policy
Installation Complete! You're now ready to start using SleepCoder. Proceed to Chapter 2: Startup, Updates, and User Settings to learn about managing your settings, or jump to Chapter 4: Main User Interface to start using the application.